Showing posts with label Thrifty Thursday. Show all posts

Thursday, March 21, 2013

Spring(y) Decor Bringing Happiness & Cheer!

I have lagged in the blogging department this past week.  This long, drawn out cold snowy weather is giving me the winter blues.  I have been having trouble finding ambition to attack certain projects recently and hoping with Spring on the way it will help bounce me back into my creative mode.  I do love a good snow day and feeling all cozied up within the confinement of our home, but this year I feel like it has dragged on for too long now.  I'm itching to get out to play in the yard and get my spray painting on! :)  The one downfall to this cold weather is that certain projects I would like to attempt have to be put on hold because I don't have proper space to accomplish them in.

This past week we hopefully had one of the last snow storms for the year.  Eli and I had a pajama day and did a little spring cleaning/decorating to lift the spirits.  I tackled the living room and a little in the kitchen to help cheer up the space while our house was enveloped in the powdery white stuff outside.  I haven't purchased any new spring decor except for 2 small items so I just went shopping around my house and rearranged some things to feel somewhat new.  The two things I did purchase were a plate from Goodwill for 99 cents and a pack of spring paper napkins from Christmas Tree Shop for $1.99 that I incorporated into the space.  I love how just taking things you own and giving them a new home can refresh and revive a space.  Before decorating, Eli decided he wanted to vacuum so we had the whole living room torn apart before putting it back together in the pictures below.  He is my little cleaning buddy and loves to help out so with paper towel and vacuum in hand, we scrubbed the room, put the winter decor away and brought out some bright happy colors.  Here is the beginning stages of Spring in our home :)


 Living Room- view from the kitchen.


Took my 2 lanterns purchased from Goodwill this past fall and flanked the mantle with them. I originally had the lanterns put together on the side table to make one large lantern this winter, but decided to give them a fresh look by separating them.  I put 2 matching Goodwill plates in the back of each one with a mercury glass votive holder in front of it to be able to light the candles at night.  

This framed card was in the kitchen but brought it into the living room for a change of scenery.  I love this little silver bird in front of it that I purchased at Michael's this past Christmas for $1.50.

I have a love for old canning jars, especially the teal colored ones.  I found this one at a thrift store last year for $6 with the lid on it.   I filled it with the yellow and gold paper straw that I use for Eli's basket and the eggs we colored last year.

Lantern with the vintage Goodwill plate and mercury glass that can change and flow throughout every season.

Little ceramic white bowl that I again filled with the paper straw and eggs that Eli colored last year.

Our egg tree filled with glass eggs from Christmas Tree Shop (last year).  Branches are reused from previous decor and they are spray painted silver and white from in our back yard.

Thrift store table that I painted gray a while back and re-purposed next to the sofa.  Doily is from Nate's Great Gram who made it and gave it to us as a wedding gift.  Love sentimental pieces like this!  
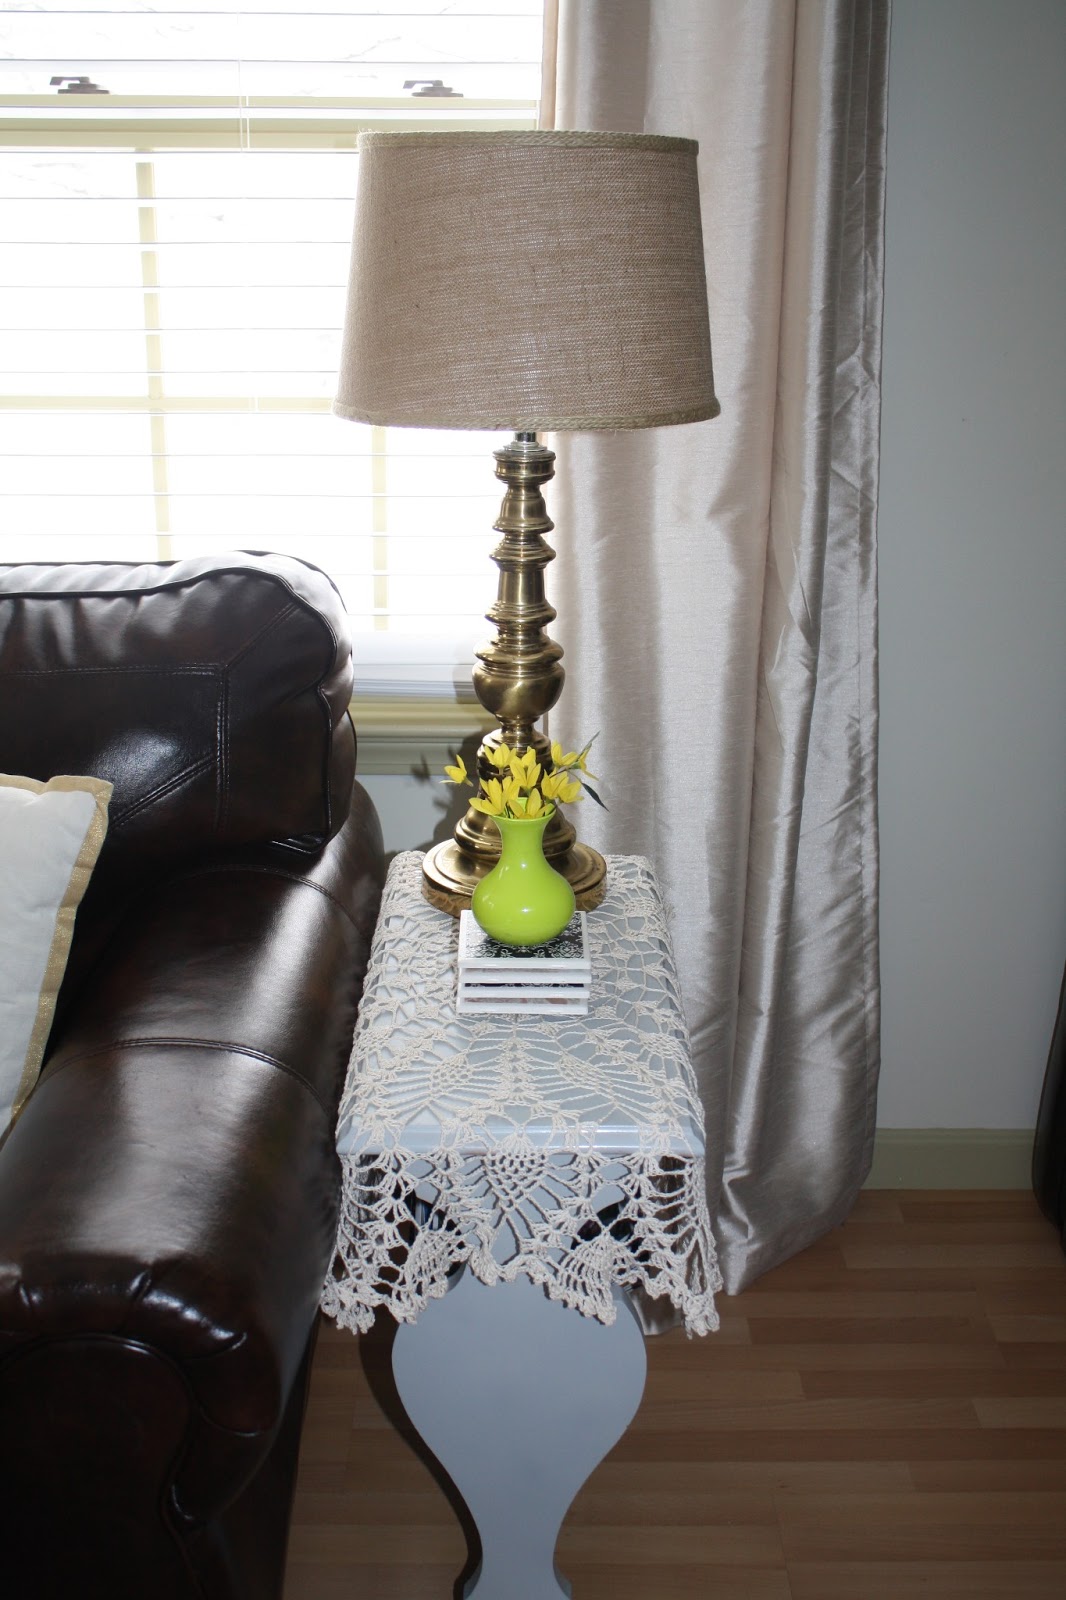
Apple green bud vase was originally clear and purchased for $1 at Walmart last year.  I used acrylic craft paint and swirled it around inside to get this color.  I'm not usually into fake flowers, but those are.  I do love them now and again.  


Here is the paper napkin I decided to frame.  Hoping the fold lines will smooth out, but besides that I love the color it brings to the room.  This frame gets changed out seasonally.  For Christmas it said "Merry" and for winter it said "Let It Snow."  These flowers exude happiness:)

Kitchen received a few little touches.

Beautiful vintage tea cup that I received as a favor at a recent bridal shower.  Inside the cup is a yellow glass egg (left over from the egg tree).

Here is the plate I scored at Goodwill this week for 99 cents.  I think it has a very Anthropologie feel.  I would like to hang it on a plate gallery wall someday.

Little frame from Michael's this past Christmas for 99 cents.  I cut out a picture from the Pottery Barn magazine and frame the little chick with an egg in it.  Thought it was sweet!  This is something you can do at home.  Find a frame laying around and cut pictures out of decor magazines for a seasonal theme.  I do this all the time.

Blue glass egg in a little milk vase.

Old scale with festive eggs from Christmas Tree Shop (last year find).


Finally hung my chalkboard from 2 months ago.  That is my little Scentsy owl (from Christmas) that I thought would be a good home for him for now.  He will have some company on that shelf here soon :)

That is the beginning stages of bringing some bright, happy cheer into our home.  Just shows that you don't need to spend much to make your space feel alive and like YOU :)   It's fun trying to be creative with what you have and making it unique to your liking.  Hope to bring a touch of Spring into every room of the home somehow.  This time of year excites me with the rebirth of everything that died or went dormant for a season.  Bright colors always make me happy and although I don't personally like them on the wall (feels too permanent), I do love decor that can be changed out and brings a smile to my face when walking into the room.  What Spring projects or decor do you have in mind?  Send me an email if you'd like and I'll post your  reno or decor in an upcoming post :)  The hubby and I are tackling our bedroom here this week (hopefully) so stay tuned for updates, as well as a nursery redo and bathroom redo in the near future as well!  Have a great day and Happy Spring everyone!

Thursday, January 31, 2013

Thrifty Thursday: Picture Re-purposed Chalkboard & Gold Liquid Leaf!

Thrifty Thursday with a Twist of a Makeover...
I am back with the full story oh how I re-purposed the frame I mentioned last week that cost me 25 cents at the Goodwill Distribution in Gorham.  Here is the before and after...


Before anyone asks why I would do away with such a classic amazing picture, it's because it was in really bad shape and the front of it was peeling, discolored and had water marks all over it.  I opted to remove it and put a new piece of wood in the frame, but I decided it was a solid base to work with and it would have been more work to do that instead.  So I ended up spraying right over the picture itself since its on an mdf type board (no glass with my picture, but I have heard of people spraying the glass with chalkboard paint and it working.  Never have done it personally however).  I love chalkboards because of their personalization.  I especially love one in the kitchen to write messages for events, quotes, scriptures or even the dinner menu for guests.   I have a small one that I made a while back, but I had been on the hunt for a larger one.  I still could go with a bigger one than this, but for 25 cents I had nothing to lose :)  Here is how my chalkboard transformation took place...

1. Covered the outside with a plastic trash bag and taped it down on the back so that I could spray the chalkboard base first.  I was a little impatient and wanted to get the ball rolling immediately when I bought the frame.  That didn't happen because you need the weather to be fairly nice so that it will dry properly and not blow all over the place when spraying.  I would love a garage someday where I can open the doors and do projects during the colder months.  Spray paint is finicky so conditions have to right.

2.  Removed the trash bag and the frame now looks like this. I did about 4 coats of chalkboard spray paint.  The backing that I sprayed wasn't completely even and was a little rough.  I sanded it a little before spraying it.  If you look at it up close you can see the unevenness but nothing that bothers me.  That's the beauty of liking an aged/vintage look because imperfections to me just bring added character to the piece :)

3.  I didn't care if the chalkboard paint got on the wood a little because I was going to spray the frame next.  I used a metallic gold spray paint from our local Ace hardware store and the Krylon chalkboard spray paint. I covered the front of the chalkboard with white paper while I sprayed the frame with the gold.


4.  I spray painted the frame with 1-2 coats of the Metallic Gold.  I was going for a vintage aged look and wanted it to have a layered effect so I didn't want the gold spray paint to be one saturated color.  I bought a gold leafing paint (similiar to gilding) that I used on top of the spray paint.  Here is the metallic gold by itself first.


5.  Next I applied the Gold Liquid Leaf with a small soft bristled paint brush.  This didn't need to be even strokes since I was going for a layered aged effect.  This product will last FOREVER (a little went a long way).  It was $5 and well worth the little "extra touch."


6.  You are supposed to wait 1 hour in between the liquid leaf coats.  I applied one coat and may do some touch ups once I have it on the wall.  I am going to wait and see what it looks like once its up in the kitchen.  I did take the brush and lightly went over the edge of the chalkboard along the frame to give it an old look.  I I had made a little boo boo and touched the chalkboard by accident with the gold liquid.  I thought I was going to have to go back with the chalkboard spray paint, but instead I decided to roll with it and make it look like it was part of the plan.  I love how the liquid leaf looks over the spray paint.  It shines/shimmers and gives it the look I was envisioning.  It compliments the mirror in our living room above the mantle very well.  They look like they could be siblings :)  Here is the finished product...


Total cost for this project:
*Frame: 25 cents
*Chalkboard spray paint: Already owned it from previous project.
*Metallic Gold Spray Paint: $4
*Gold Liquid Leaf (optional for the look I wanted): $5

Under $10.00 for this project!

This could become an obsession for me.  They are fun to make and would make great gifts!  Anyone make one recently or been wanting to?  I say GO FOR IT....its easy and simple!  Such a fun way to display notes or a message to someone in your family :)