Friday, December 28, 2012

Kitchen Renovation Before & After Photos!

Our kitchen is truly the "heart of the home."  It is the heartbeat of the family.  The central place we all gather together and love is shared.  When buying our first home a couple years ago, my desire from the beginning was to create a space that reflects who we are and to bring a sense of welcoming warmth for all who set foot through our door.  I wanted our house to be "our home."  And the place where we spend most of our time together as a family is in our kitchen.  This was our first major project in our dreamy list of "to do's".  We have been slowly but surely tweaking our kitchen to our likingIt has been a labor of love and a process that is still in the making.


Painting wood/oak cabinetry is definitely not for everyone (its certainly a matter of preference), and for us, we knew from the get go that this was what we wanted.  I envisioned a light, airy, bright space that beamed with happiness and would put a smile on my face every morning when entering.  This is definitely the outcome we have accomplished and I can't wait to share all the finishing touches as we semi-complete our kitchen renovation in the coming months.  I will share before and after photos here in this post to give you an idea of what we have done and I will also update you in an upcoming post on our most recent kitchen renovation project:  our back splash.  Throughout this process we have been doing projects/updates in stages so that we could keep to a budget.  I will give a rundown of price per project in my next post to give an idea of what it cost along the way. This will give you a better idea of what it entails and so that you in turn can have a beautiful kitchen on a budget as well.  Looking back, I wish I had taken more photos during the process.  From here on out, I am committed to doing so :)  Here is the timeline of our kitchen renovation to date with before and after photos of our progress.

BEFORE...


DURING the PROCESS...


KITCHEN RENO TO DATE...


Only recent picture I could find of our eating area.  This was before Eli's 2nd birthday.  I will take updated photos of our house after the new year to do a full house tour!


I will be back here soon with a post on our most recent kitchen project...subway tile back splash, as well as a cost rundown of our kitchen renovation.  I will keep you posted on a few more projects we have lined up in the coming month.  Thanks again for stopping by!  Enjoy your weekend!


Monday, December 17, 2012

Silhouettes, a classic and beautiful gift!

Goodmorning from Portland, Maine on this very cold and snowy day :)  Our house is being enveloped and blanketed in all that white stuff and since it's Christmas week, I'm pretty happy about it.  Eli and I are planning to go have a playdate in the snow in a little bit.  For some reason, snow takes on a whole new meaning when you have a child.  There is something so fun and magical about the joy it brings to a childs heart.   I'm looking forward to our mother/son date...today more than ever!  Hug your children tight and don't let the little moments of bliss pass you by.  When I think of the aftermath in CT on Friday, there are parents who no longer will be able to enjoy the simple pleasures of life with their kids and it breaks my heart.  Lets all learn to enjoy, cherish and seize every opportunity to spend time with our children and loved ones in a new way.  Life is a gift and may we all be reminded of it this Christmas season!


Now onto the sweet project I did recently of Elias' silhouette.  It is very simple, cost effective and quick.  I think it would make a great gift if you are looking for something creative and memorable to give to your loved ones.   I have always been drawn to the old vintage silhouettes and remember getting one done of myself along with my siblings when we were younger.  Ours was much more intricate where someone used an art cutter to cut our profiles out by just looking at us.  It was amazing and I still love to look at it when I go to my mom and dads.  And because of that experience, I was always a little intimadated of ever approaching this project because I never realized it would be so easy.  BUT, you will be amazed at how EASY it is!  Drumroll please....here are the materials you need and the process of putting it together.  Trust me, there is no art cutter involved, Thank God :)

Materials :
  •  5x7 or 8x10 profile picture of your child or whomever you would like to use.  I chose to use a 5x7 because of the frame I purchased.
  • Picture frame of your choice.  I knew I wanted an oval picture frame.  I found one at Mardens for a pretty reasonable price and it has somewhat of an old vibe to it.  
  • Black acrylic paint and paint brushes
  • Paper to adhere your picture to for the matting of the frame.   


Directions:
  • Cut the profile of the child out of the picture.  Use the black acryclic paint to paint layers on the picture.  It takes several layers to get the desired effect.  It doesn't look great in the beginning but after at least 4 layers it's completely solid black.  Key to remember: Make sure the air is dry and let it dry between coats for at least 20 minutes so you don't jeopardize taking the paint off.  The picture is glossy so it takes time to adhere.  
  • After several layers and you get the desired color saturation that you want, let it sit and dry for several hours.  Once the picture is completely dry and has "cured" so to speak, adhere it to whatever paper you choose.  I used just a plain white piece of paper to keep it simple, but I think you could be creative with it.  I thought a burlap style paper (like the one I used for my bunting banner ) would look great, so I may change it up.  Cut the paper to fit the frame and then glue the picture to the paper.  I used a glue stick that I use for scrapbooking.  And Voila, you are able to place it in the frame to see your finished masterpiece. 
 1st layer of paint

 2nd Layer of paint...you can see the darkening that is taking place.

  Finished Masterpiece!

Breakdown of Costs:
  • Frame- $9.00...You could definitely find one for less than this.  I just could not find an oval one that I liked anywhere.
  • Picture- Around 50 cents. Printed at Sams Club
  • Acrylic Black Paint- $1.00 at Michaels 
  • White Paper & Paint Brushes-  I already had from previous projects
  • Total= $10.50, but could be done for less.       

Now you can sit back, admire, and enjoy your piece of art.   This is one of my most beloved keepsakes that I plan to do with all our children someday and would love to do it at different stages in their lives to see the progression when they are older.  It's funny how even when you paint over the picture, you can tell that it is totally your child by their little features that are so unique to them :)  I hope this gives some of you an idea if you are at a loss for something to give or make.  Enjoy this busy week leading up to Christmas and try to take time to savor all that is going on around you.  Thanks again for stopping by!  

Friday, December 14, 2012

"He is close to the brokenhearted..." My heart is heavy as I think upon today!

 "He comforts us in all our troubles so that we can comfort others. When they are troubled, we will be able to give them the same comfort God has given us." (NLT) 2 Corinthians 1:4

My heart is broken at the downright evil that took place today in our nation.  I am reminded of how bad things happen every day to good people and we can never take for granted where we live.  Things like this can happen anywhere and how do we prepare our hearts for such a  catastrophe?  As a parent, I can't imagine what the parents and families are going through at this very moment as I type this.  This is something that no parent can prepare for nor should they ever have to.  It is so unfair and unjust and to think about the uncontrollable fear that paralyzed those children in their last moments is unfathomable.  It brings me to tears and makes me so mad at the enemy for stealing the innocent and true joy and hope from peoples lives.  I close my eyes and try to put myself in their shoes.  I think about Eli and sending him off to school trusting that he is in the safest place possible.   A parent never entertains the thought that the worst could happen there.

Today, a parents worst nightmare and fear took place. My heart hurts and no words come to mind that can justify the deep ache that I feel for the people of Newtown, CT tonight.   This is a tragedy that cannot be undone and nothing can be said to make things right.  The only thing that we as a people can do when something like this hits close to home is to be the comfort that He is to us.  This is the extension of God's hand in the flesh and He promises in the scripture that when people are troubled, we will in turn be able to bring comfort to them as He has for us.  My prayer tonight is that the victims of this horrific event would tangibly feel the supernatural comfort of the Creator extended through the hands of the created.  This is the only thing anyone can offer at a time like this because I'm sure everything appears to be caving in for many right now.   May the families who are hurting, broken and crying out in anger tonight be justified by the One Constant that remains true and faithful.  I trust that God will be their comfort,strength and peace because nothing else in the natural could even come close to bringing them through such an uncertain and heart wrenching time. One positive that stands out to me from all that I have seen, is that the teachers are truly heros.  They loved, protected and fought to keep those kids calm in the midst of chaos.  It's a blessing to have people standing to fight for our children and comforting them when we as parents cannot be present.

As we all lay our heads on our pillows tonight may we all be reminded to pray/intercede on the behalf of the broken and those who can't get the words, courage or even faith to trust and believe for themselves.  This is a crisis of life that so many are facing and lets stand in the gap for those that are hurting.  May we not walk and live in fear because of the evil around us, but put all our hope and trust in Him.

I am hugging my little guy tighter than ever tonight, thanking God for blessing me with him and the time we have together.  Life is just the blink of an eye and let us never take for granted the blessings of life.  Evil will never be abolished here on earth, but we can stand and fight for righteousness, comfort those who have been done wrong and stand in the gap for those who are too weary to fight!    Psalm 34:18- "The Lord is close to the brokenhearted and saves those who are crushed in spirit."    Lord, thank you for being all that you say you are in scripture and for being close to the broken tonight.  Only you can comfort, heal and mend like no other man or hand can! 

Wednesday, December 12, 2012

Christmas Bunting Banner...Easy Peasy!


Bunting Banners are a special friend of mine.  I seem to create one for every birthday party or holiday....it never fails! I also love little touches for the holidays that take minimal time and little money.  This is one of those projects that will cost you very little and you can whip this together in under 30 minutes.  I came across a blog recently, Shanty2Chic , with Free Printables for every letter of the alphabet along with other various symbols for every holiday.  I saved that link immediately knowing it would be my go to site since banners are a thing I create often.  Instead of cutting letters out by hand, I can let the printer do most of the work from now on :)  It's a win for me! 

I kept my banner simple because once you print them out, each individual letter is quite large.  I would print one out before settling on a word so you can figure out if it will work in the space that you have designated.  Originally I was going to use the mantle or one of my shelves but the banner was too big so I decided to use the doorway between our kitchen and living room.  I kept it simple and used the word CHRISTMAS.  I decided to use the chevron pattern to frame it out since I have a pillow to match in my living room.  I am very pleased and happy with how it turned out.  The best part is that it only cost me around $3.50 and took me about 20 minutes to put it together.  This is a project that anyone can do and it makes a really big statement in a room!  Here is the rundown of materials used and the process of it.  It's pretty straightforward but I'll list it out anyways.

*Materials :
  • Printing paper (I used plain white but you could use any color).
  • Design paper for behind the letters (I used a burlap design for a rustic/natural look.  I found this at Michael's.  It is normally 59 cents a piece but they were having a sale 4 for $1.00 a few weeks ago.  They are continually having sales and there are always coupons to take advantage of.  I rarely buy anything there without a coupon.  Every time you shop, you get a 40% off for your next visit so I automatically stash those away till I know there is something I need for a project.  
  • Ribbon or twine to hang your banner ( I used silver sparkly ribbon because it is what I had on hand for Christmas.  I think next time I would use a natural twine.
  • Tiny clothespins (you will find these at the craft store.  I again bought these at Michael's with a 40% off coupon.  They are normally $2.99, but I paid $1.80 and I still have some left over.
 

*Directions:
  • Print out your word.  Every letter takes up a whole 8x11 piece of paper.  Cut your letters out along the edges of the triangle.  
  • Cut a slightly larger triangle out of your design paper to fit under the letter triangle.  This will show through on the sides.  I left about a 1/4 inch or a little less all the way around (see pic above).  I made a template first and than I just traced it so it wouldn't be so time consuming.  Cut your second set of triangles out.  
  • Now it's time to layer them.  You can opt to glue the 2 triangles together if you want or if you're like me you can just clip them together and hang them on your ribbon or twine.   
  • Now it's time to clip your word up, hang it and stand back to admire it!


What word are you thinking of creating?  Have fun and enjoy the beauty of the season!  Happy Bunting!

Fun with Felt and what Christmas is all about!

Fun with felt, who knew?  After seeing something similiar on Pinterest (YES, i'm a Pinterest ADDICT and I am willing to admit it:), I decided to try out our own version of the project below. 

Our family is having so much fun with Eli this Christmas season because it's the first year he is really aware of all that is going on.  It truly makes my heart dance when I see his face light up with excitement at all the lights and festivities that this beautiful time brings :)


We want Eli to first and foremost understand that Christmas is about Jesus and God loving us so much that He sent His Son so we could be with Him forever.  We want him to realize that this is a time to refocus our hearts on the true meaning of what life is about and to shift our eyes off of ourselves and onto others.  We don't ever want this time to become all about the presents, Santa, and "me" or "us" focused driven.  Yes, Eli thinks there is a Santa and we don't discourage it because we love seeing the excitement of his imagination, yet we aren't giving him credit for this season.   I find as a parent, its a great time to re-emphasize what we should be doing throughout the year, loving Jesus so we may love on others and give of ourselves not just through money but our time, resources and friendship.  Of course we LOVE to put up a Christmas tree, decorate, make cookies and even buy gifts for people, but when it comes down to the end of the day, I want my heart to be set on Him and not the hustle and bustle of this busy and stressful season.  May we all find true peace in the midst of all that life brings!

With that said, here is a quick, easy craft that is fun for the kiddos.  They can have their own interactive tree that can be changed up whenever they feel like it.  Eli was wanting a tree for his playroom and because of limited space I thought this would bring a new element of fun where he can learn hands on about his shapes and enjoy doing it at the same time.  He was thrilled and as a mom, so am I.  Here are the materials needed:


  1. A large piece of green felt.  I found this in a package at Michael's for $3.99 and used a 40% off coupon, which made it around $2.50.  I bought a few pieces of felt to make ornaments which were 29 cents each.  I drew the Christmas tree free hand to give me an outline but as I cut it out, it took it on its own shape.  The great thing about it looking the same on both sides is that if your marker lines show on one side just flip it over and tape the back instead.
  2. Marker to trace your shape, scissors to cut it out, and tape to put up Christmas Tree.  The beauty of felt is that it sticks to itself :)
  3. Any cookie cutters or outlines to trace.  I used canning jar lids for the circles but anything circular would do.  I drew the star, gingerbread men, and candy canes free hand and the other felt shapes were left over ornaments from our main tree.  I bought these last year for 50 cents a pack at Target after Christmas.  The kids will not care if they are not perfect, so have fun and be creative :)

I put the tree up last night when Eli went to bed (taped it to the wall.  I used masking tape because it holds well but doesn't take paint off) and decorated it in the pic above.  When he woke up, I took all the ornaments off and let him have at it.    He had a blast decorating his "own" tree and allows him to let his own creative juices flow.  He can rearrange all day long if he wants.  After Christmas, this project is easy to fold up and store in a baggy for next year.  I love things that you can reuse year after year and becomes a tradition and great memory from childhood.


Eli's finished product!!

Let me know if any of you try this and how it comes out!  I will be back later today or tomorrow with a post on a "Christmas" sign I made with free printables! Happy Wednesday!

Monday, December 10, 2012

Christmas House Tour 2012

Our home is our refuge, a place where we can be ourselves and not worry about anything else.  It's truly a blessing to call our "own".  Growing up, I always loved how my mom took care of our house.  I took so much comfort and security in feeling the warmth and coziness of all the love she provided through cooking, decorating and doing projects around the home.  For me, it is the best art canvas to be able to put your own mark and identity on it without any reservation.   The greatest compliment that my husband ever gives me is that he is thankful for coming home to a house that is cared for and given so much love.  It's amazing how just filling your home with what you love will create such a difference in your mood and attitude.

Now that the 2012 Christmas season is in full swing, I thought I'd share a glimpse into our home.  It's nothing fancy but it's the little touches that bring meaning and cozy warmth into our surroundings.   Here is a little sneak peak into our sweet abode during this beautiful Christmas season!  More posts to come on some crafty items I have worked on in the past few weeks.  Merry Christmas from our home to yours!

  
Old jug filled with lights on an old step stool I restored for Eli.  I spray painted it red and he
loves using it to help in the kitchen or to reach the potty in the bathroom :)  Jug makes a great night light!

 
 Homemade NOEL sign and snow globes (tutorial to come).  Tree from Michael's (with 40% coupon)!

 
Compilation of new and old jars on an armoir I refinished.

 
Snow Globes....Anthropologie inspired!

 
Pencil tree in kitchen (handed down from my mother, thanks Mom :).  Homemade snowball garland
and star (tutorial to come). 

 
Homemade shelves out of old wood laying around in basement.  Love me some white
and turquoise in the kitchen.  Owl, recycled glass, and mason jar love :) 

 
Wooden box from Michael's (40% coupon...literally cost $3.00). Refinished with paint & walnut stain.
Mason jars and little milk bottles with Epsom salt for snow, cranberries and tea lights.

 
Love open shelving in kitchen.  I like sprinkling Christmas bulbs and pine cones throughout the house. Spray painted terra cotta plant pot and pine cones with silver spray paint.  Large bulb hanging from 
basket is handmade mercury glass.  Fun and easy project!


Homemade chalkboard from old picture frame at Goodwill ($1.99).  Clear glass pedestal 
bowl from Christmas tree ($3.99)  filled with Epsom salt, cranberries and a green pine candle.
You'll notice the subway back splash behind it.  We just did that project recently and will post
a step by step tutorial.  It's a very affordable, cost effective way to do a back splash.

Our Advent calendar.  This was a purchase we made before Eli because I loved the look of it so much.  Eli loves to play with it and that is his stash of candy canes that we have to put up high or he would eat them all in one sitting.  Candy cane obsession right now :)


Stockings hanging from TV stand till I hang them from mantle. Eli's is a Christmas gift purchase for this year.  It is from Pottery Barn kids and was on sale for $17.  I thought that was pretty good since it was comparable to the Target stocking prices.  Out of all the options, he picked out the train stocking all by himself :)

 
Our beautiful nativity set that I scored at Pottery Barn last year after Christmas.  It was normally $200 and I was able to get it for $20.00!!!!!  I am in love.  It has gold edging which gives it an old/aged look. I just recently found the stable at Goodwill for 99 cents.  The candlestick/vase in the base is hand blown glass from Christmas Tree (it had a little chip on top so I got it for $5 and its huge!).  I spray painted branches silver and white from the woods and hung some handmade ornaments on it.  Those are mercury glass and Epsom salt bulbs made last year.  Fun and easy :)

 
I wanted to add some character to our plain/builder grade style cape home.  I found this old farmhouse mantle at a thrift store in Fairfield, Maine. Its believed to be from early 1900's.  It's definitely not in perfect condition but I loved the look of it.  With a little paint and walnut glaze stain, it came out beautifully!  I painted the wall black in behind the little electric stove we purchased last year.  Believe it or not that little stove is very efficient and it helps keep our home comfortable when we turn the heat down.  I wanted white and mercury glass as decor on mantle cause I feel it makes a timeless statement.  Those white trees flanking the mantle are from Christmas tree, one of my favorite places for holiday seasonal decor ($1.99 for both because they were stuck together till they miraculously came apart when we got home and they fell out of the car on the ground:).  The little mercury glass owl is from Christmas tree ($1.99 last year) and the tiny silver bird is from Michael's ($1.50 on sale couple weeks ago).  Mercury glass candlesticks were a cheap purchase last year after Christmas when Target was having their 70% off sale on all holiday decor.  There are a couple mercury glass votives from Kohl's on sale ($5.00 for both) and the JOY sign was a purchase we bought our first Christmas together.  The wooden tray on top of the electric stove is a dollar store find from long ago that I spray painted silver this year.  I topped it with a large cinnamon pine cone from Michael's ($2.00 and it smells AMAZING), and a little white vase (crate and barrel $3.00) with a little faux poinsettia in in.  The basket is a free find from one of my dad's moving jobs (Thanks Dad:), which we store blankets for this cold winter season.  The pillow in it is a DIY inspiration from Pottery Barn last season.  I used a white pillow cover I had laying around and cut out green felt leaves and hot glued them into a wreath formation.  I then took little white snowball poofs from Michael's and hot glued them sporadically all over the wreath.  I loved how it turned out !!!  I love myself a bargain :)  Only thing I splurged on in this picture was the mirror.  I had been searching for over a year for a sunburst mirror that I loved and proportions had to be right.  I found this beauty at a vintage/thrift store in Newburyport, MA, a sweet coastal town that we went to this summer. 

 
We decided to go faux this year.  Last year at Target we scored this fake tree after season for $60,   originally $300.  Instead of a traditional skirt, I used our sheepskin rug from IKEA (bought last year for around $20.00.  It's real and oh so soft!!).  Our theme on the tree this year was bright and cheerful. All decor was purchased last year after season REALLY REALLY cheap. The garland we used is left over burlap from my brother's wedding.  It is really wide so I tide it in knots every couple feet to give it a cinched look.  The tree is covered in white snowflakes from the dollar store which really sparkle when the lights are on.  We do love getting a real tree and the experience of it.  However, I also enjoy decorating right after Thanksgiving so having a real tree doesn't do well for that span of time.  We compromised and bought a tree that looks semi real even up close because it has 3 different pines mixed in on the tree.   Nate loves bright colors and says this is by far his favorite tree decor since we married 5 Christmas's ago.  Thanks Love! :)
 
 
DIY Christmas art this year.  Bought the 3D MERRY sign this fall in dollar section at Michael's. Found this sparkly green paper for $1.00 at Michael's as well.  White frame is from IKEA a while back.  Hot glued MERRY to the paper and for $2.00 you have a piece of holiday art.  Simple, quick and very easy.  Totally my cup of tea :)

JOY sign....a great memory of our first Christmas together as a couple.  

Close up of the silver wooden tray, large cinnamon pine cone and faux poinsettia.

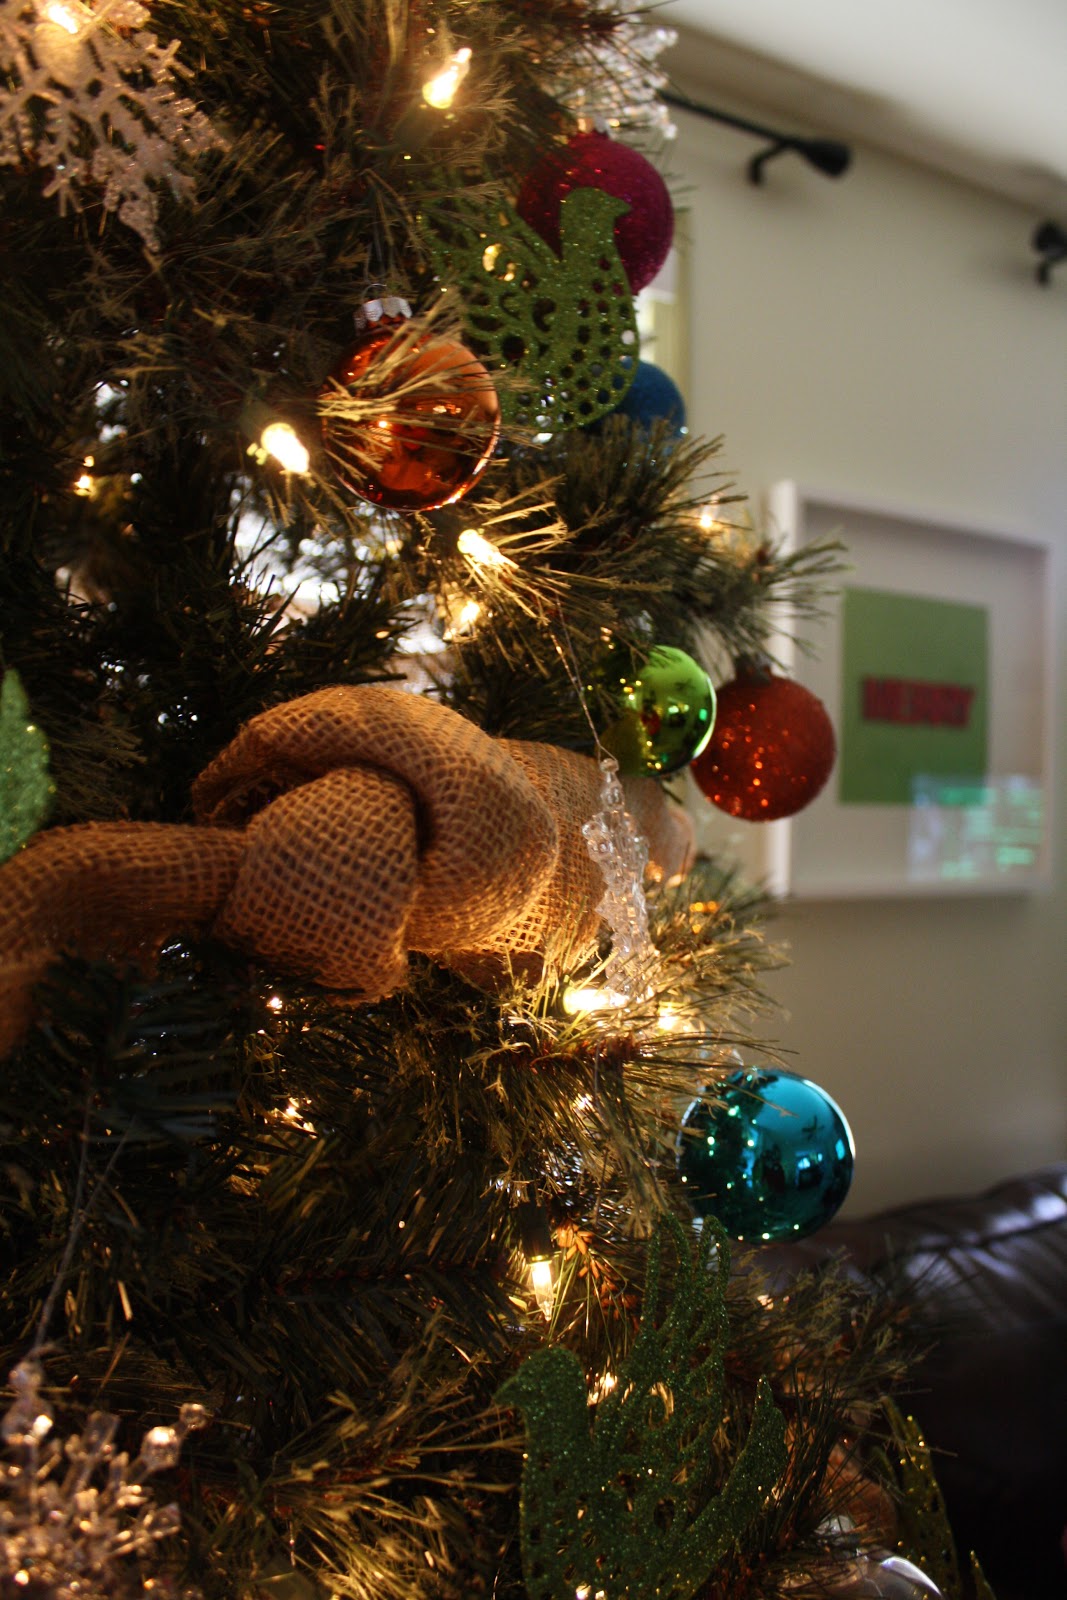
Close up of the teal blue ornaments. 

 
Close up of burlap tied into a knot around the tree. 

 
This is our kitchen after all the changes and updates we have made over the past 2 years.   Here is the run down of changes we have made and so happy we did!  I think the kitchen is the best bang for your
buck when redoing a home. 

1.  Sanded, primed, and painted all the cabinetry.  Previously oak.
2.  Purchased stainless steel appliances
3.  Spray painted hinges and some of the hardware black.  Bought drawer pulls to match which were really reasonable.   
4.  Big purchase this year with our tax return:  Granite counters.  
5.  Purchased Farmers sink from IKEA (really inexpensive compared to other places).
6.  New faucet from Lowes
7.  Subway tile back splash that we put in ourselves
     
**To Do List for the Kitchen as of Today:
1.  Crown molding to the top of the cabinetry and paint to match.
2.  New lighting above sink and bar
3.  New door to basement

Thanks for taking the tour of our home here at Christmas.  What Christmas projects have you been doing lately?  Would love to see and hear :)